


Introduction
Creating a project schedule in Microsoft Project, although daunting, is rather simple once you understand this project management software. Generally speaking, it's the core part of any Microsoft Project Training course.
In order to ensure MS Project behaves the way you want it to, it is important to set some options prior to creating your project plan.
The first setting we will make is to specify Auto Scheduled mode. Be sure to have a project open in order to perform this step.
- Specify Auto-Scheduled mode
- Navigate File > Options
- Select the Schedule Page
- Locate in the Schedule options for this project section and select Auto Scheduled for New tasks created.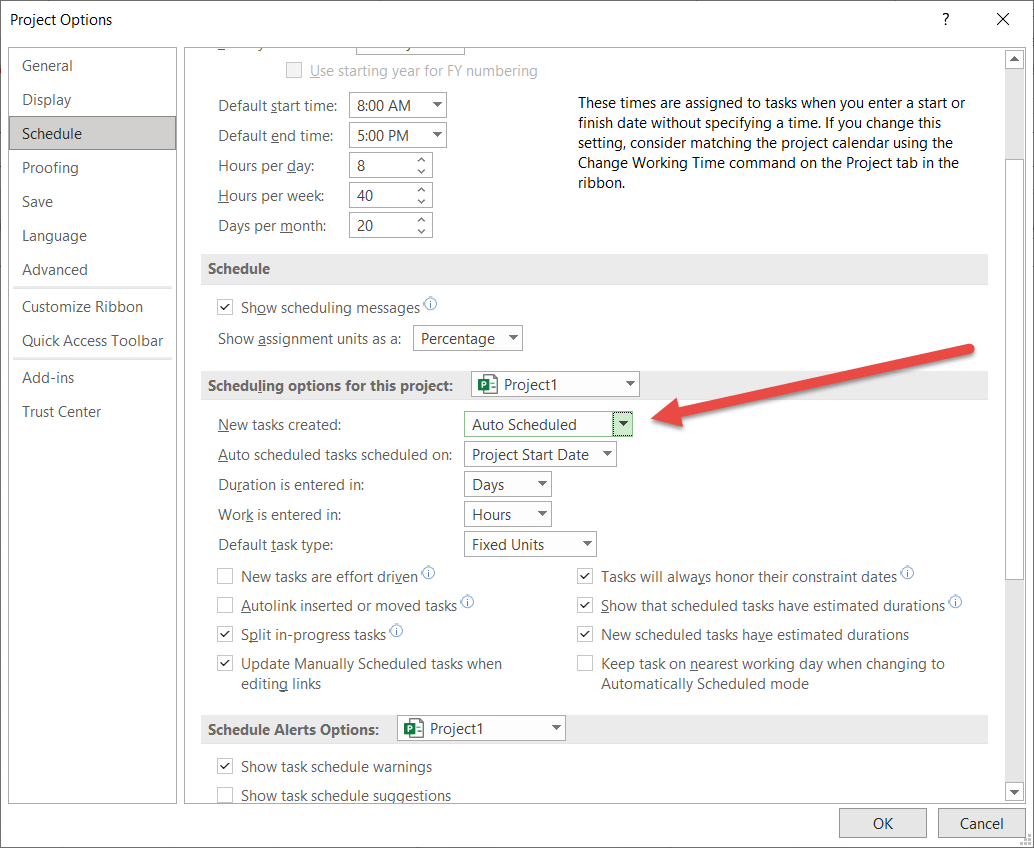
Why use auto Scheduled mode?
What this setting does is it ensures the tasks in your project will be scheduled (Start, End) based on their relationships to other tasks, as well as the assigned resources working days in relation to the project calendar selected. This is what we want in order to have our schedule reflect reality. If the tasks did not automatically schedule we could just use a tool like Excel and type in a bunch of static tasks.
It is the scheduling of Microsoft Project that makes the software such a powerful project management tool.
Go ahead and close the Project Options dialog box. You will now notice in the bottom left of the view that New Tasks : Auto Scheduled. - Calculate Project after each edit
- Locate the setting Calculate project after each edit setting in the Calculation section and turn it on.
This setting tells Microsoft Project to re-calculate the project schedule immediately after every change we make to it. Meaning, when we change Work we want to timeline/critical path to be immediately updated in order to understand the impact of the change. This is important because as project managers we need to always have our information up-to-date.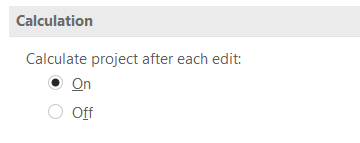
- Open a Blank Project
- From within MS Project navigate File > New, then select the Blank project option.
We should now have a blank Gantt Chart view as shown below: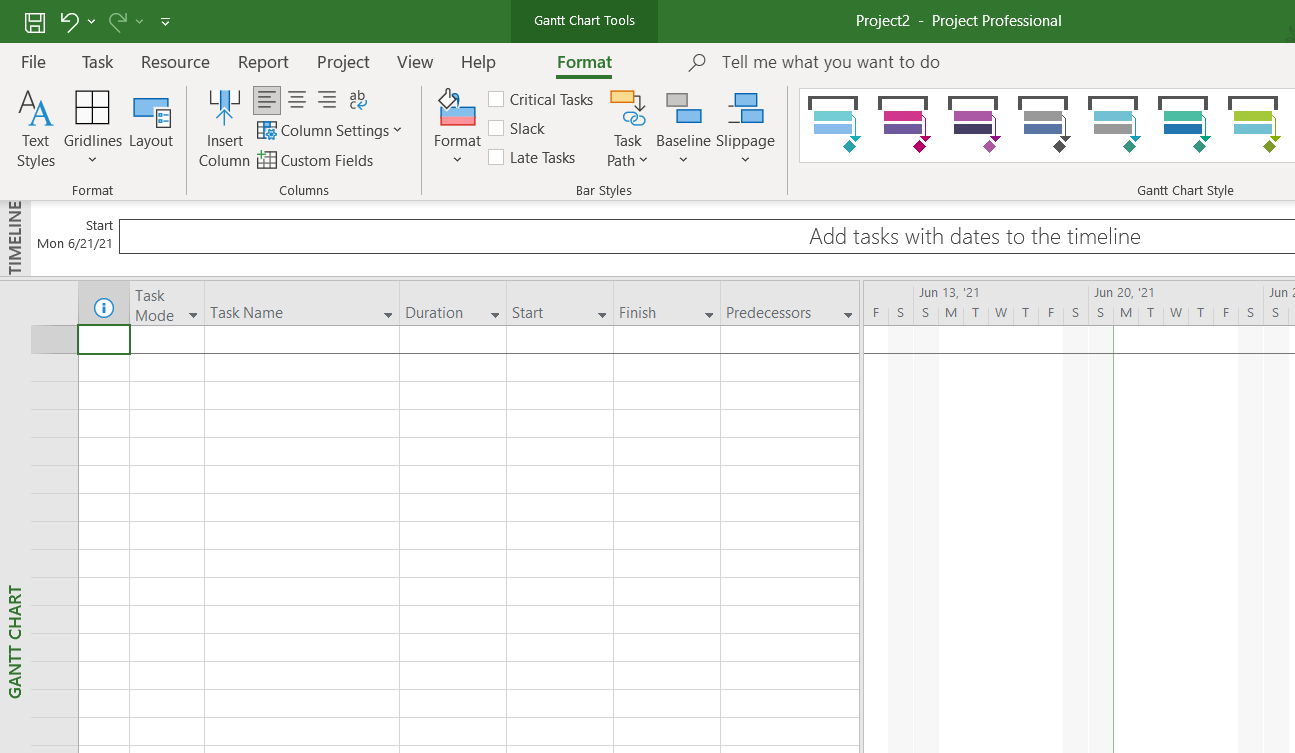
- Insert the Project Summary Task
Now that we have our blank Gantt Chart ready for tasks we are going to display the Project Summary Task. This task will contain all other tasks in the project and is a big help to see the aggregate numbers.
- Navigate to the Format ribbon and in the Show/Hide section select the checkbox for Project Summary Task.
You should now see something like that shown below. Once we save the project, Project2 shown below will reflect the project name.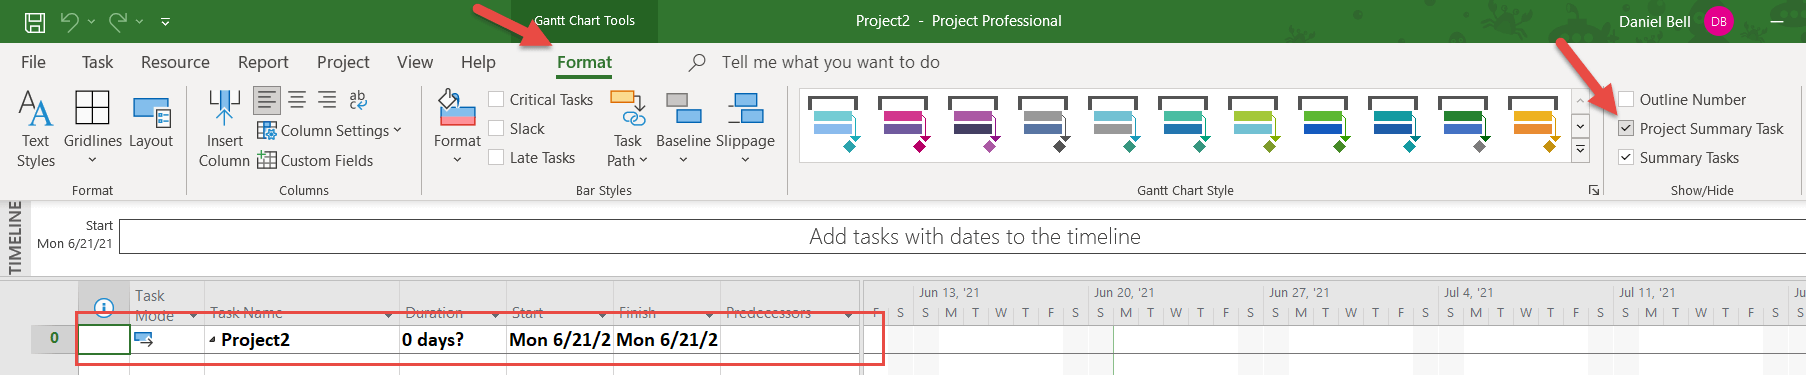
- Save The Project
- Navigate File > Save As , select the folder you want to save the project in.
- Now give your project a name in the Save As dialog box, then click the Save button.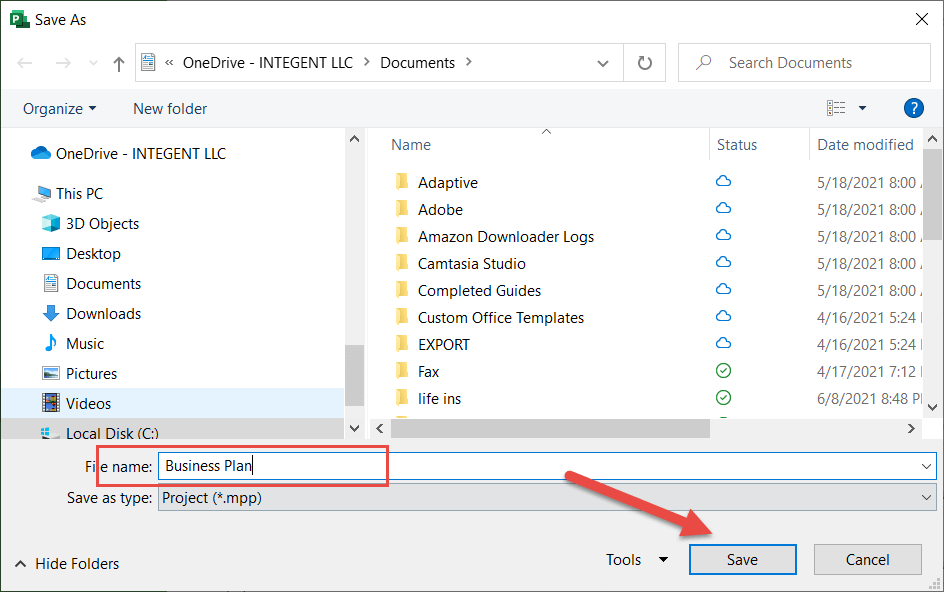
- Set the Project Start Date
Another important step is to tell Microsoft Project when you project starts. Even if you don’t know the exact date, enter one as close to when you think the project may start.
- Navigate: On the Project tab in the Properties section click the Project Information button.
- In the Project Information for New Business dialog select a Start Date. In our example I selected 6/21/2021.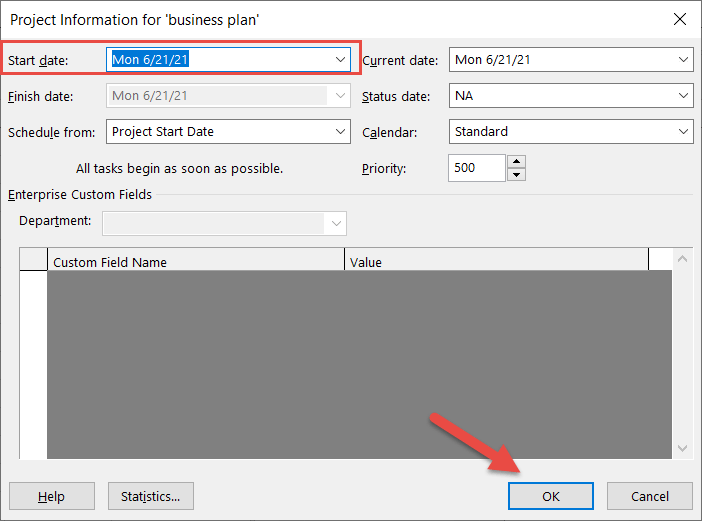
There are several other items to note in this dialog box.
- Status Date: displays a vertical line in the Gantt Chart to reflect the selected Status Date. This is commonly used when creating a Status Report
- Schedule from: This setting tells project whether to schedule the tasks based on a Start Date or an End Date. Although it may be tempting to have Project when you should start your project based on a given End Date, it is always recommended to schedule from the Start Date. - Enter your Work Breakdown Structure (Task List)
- Let’s go ahead and enter the Tasks into Microsoft Project. I typically use the Gantt Chart view to create my WBS.
Below is what the Gantt looks like after entering the task list. Go ahead and enter the tasks shown in the screenshot below: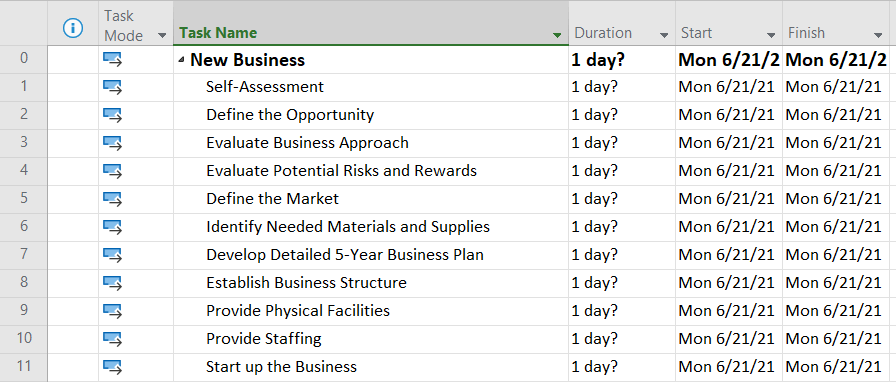
If you look closely at the task list you realize the we have not given MS Project the information it needs to create a critical path. Project needs to know either the Work or Duration, as well as the dependencies between the tasks. Once we start entering this information the timeline will be calculated. - Enter Task Durations
First we will tell MS Project how long we think the tasks of the project will take to complete. We could provide the amount of Work each task will require to be completed, and based on the assigned resource MS Project would calculate the Duration. In this case, however, we want keep our project simple.
Keep in mind that Duration is the amount of time it will take to complete a task.
Work on the other hand is where we specify the Effort required to complete a task.
- Using the Duration column, lets enter durations for the tasks of our project. We can use a “d” or “w” to specify increments of time (as well as others).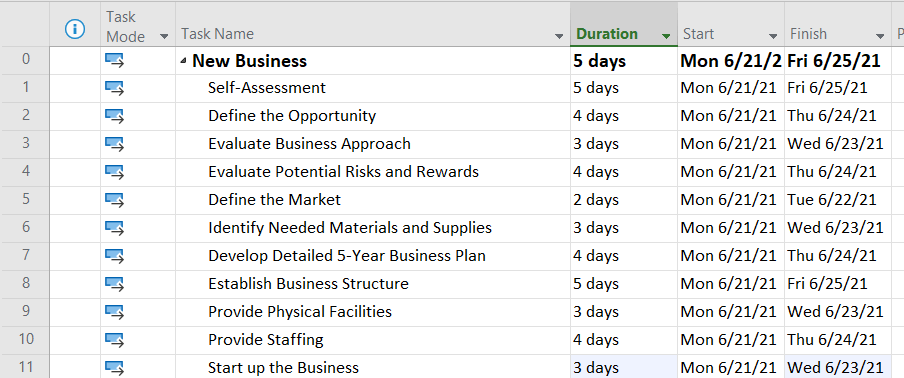
- Create Task Dependencies: Predecessor Column
If you recall we stated the tasks need to be completed in a specific order. This is where Task Dependencies (or linking tasks) comes into play. We can create dependencies one of several ways.
• Specify task ID in predecessor / successor column
• Click and connect Gantt Bars in the Gantt Chart.
• Select two or more tasks and click the Link the selected tasks button on the Task ribbon
Let’s look at this process starting with the first two tasks:
• Self-Assessment
• Define the Opportunity
In this case we want to complete the Self-Assessment prior to starting work on defining the opportunity. Certainly, some of our tasks may be able to have overlap, however, we’re going to use a waterfall approach for all of them.
In order to tell Microsoft Project Define the Opportunity comes after Self-Assessment, we enter the ID of the task Self-Assessment in the Predecessor column of Define the Opportunity. This is because one task must preceded the other.
- Therefore do as follows: enter a 1 (the ID of Self-Assessment) in the Predecessor column of Define the Opportunity.
If you now look at the Gantt Chart, you will see the Self-Assessment must be completed before Define the Opportunity. The Start and End dates also reflect that the two tasks happen sequentially. The relationship used in this particular case is called a Finish to Start relationship.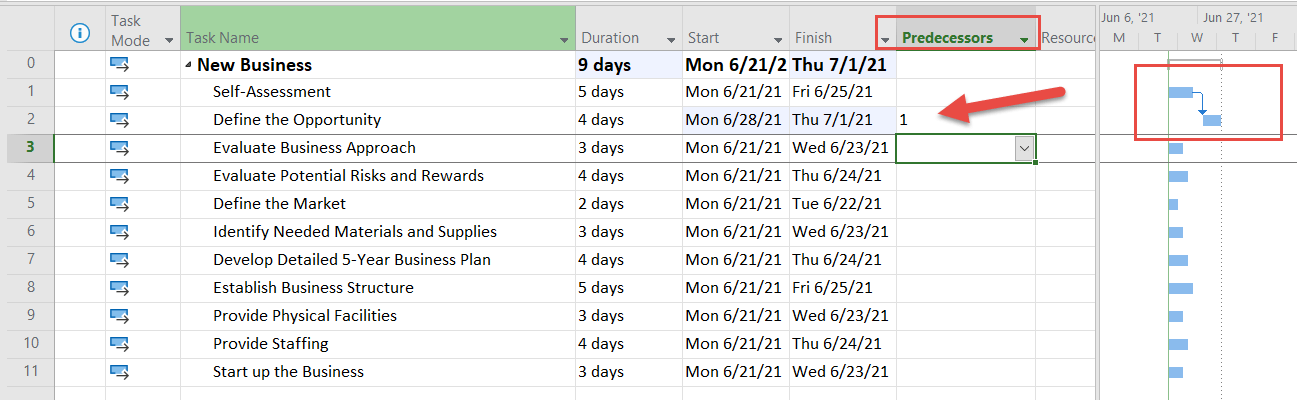
If you look closely you will also notice that although Self-Assessment finishes on 6/25, Define the Opportunity does not start until 6/28, which is 2 days later. This is because MS Project skipped the weekend as our Project Calendar is a 5-day work-week calendar with weekends for no work. - Create Task Dependencies: Link Task Button
- Select the task Define The Opportunity, hold the ctrl key, and select Evaluate Business Approach.
- With both tasks selected, click the Link the Selected Tasks button on the Tasks ribbon.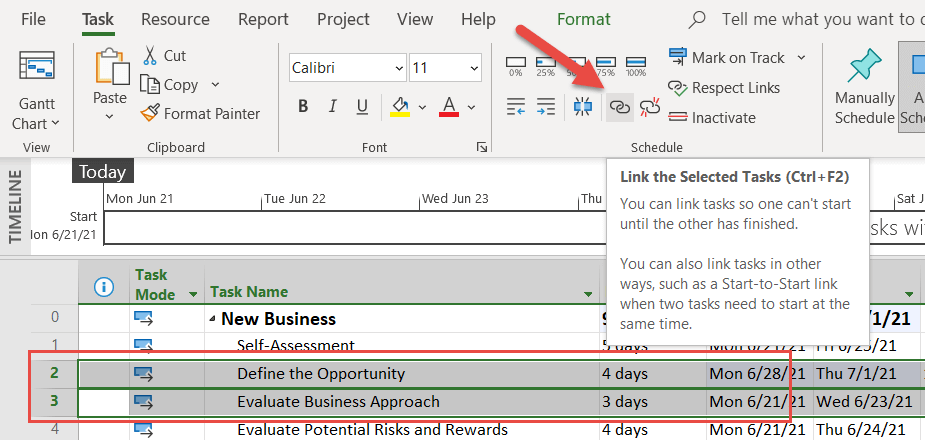
Now noticed that we also have a Finish to Start relationship between Define the Opportunity and Evaluate Business Approach - Create Task Dependencies: Remaining Tasks
Now lets to ahead and link all the remaining tasks of the project.
- Select the task Evaluate Business Approach, then hold the Shift key and select the last task Start up the Business.
You should now have those two tasks and all tasks in between selected.
- Go ahead and click the Link Selected Tasks button in the Task ribbon.
All your tasks should now be linked and your Gantt Chart should reflect the entire timeline of your project as shown below: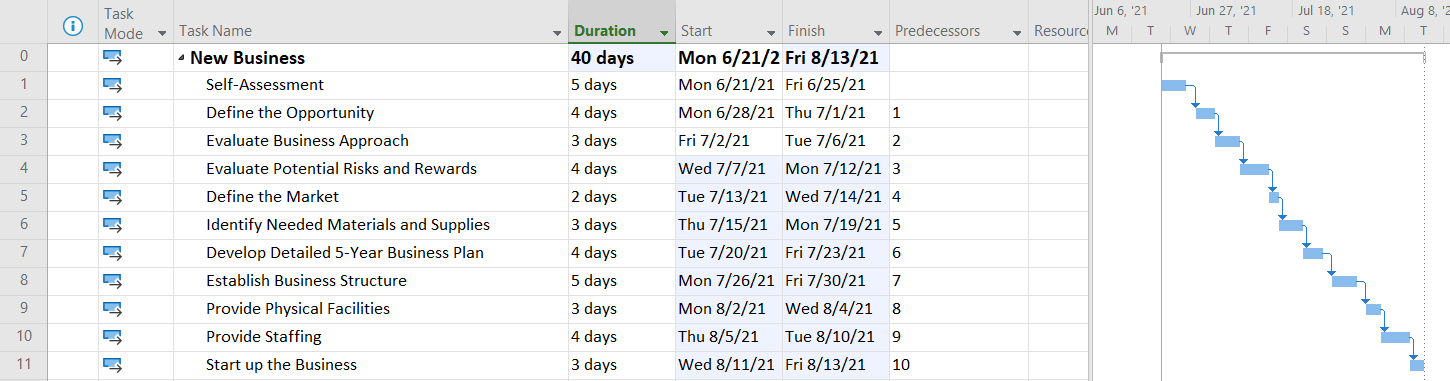
- Create Milestones
Milestones are an important part of your project schedule. Most often they will represent the completion of a specific set of tasks that produce a deliverable. Or perhaps a significant event in your project. Nonetheless, they are something you and the entire project team are working toward in an effort to complete the project. In our case we are going to create one simple milestone noting the creation of our business.
The way we do this is by entering one more task at the very end of the project named.
- Enter a task named Business Complete, and specify a Duration of 0 days.
Specifying a Duration of 0 turns the task into a Milestone.
- Finally we create a relationship between the task we just created and the task before it, Start Up The Business.
Use one of the previously described methods to create that relationship. When complete your schedule should look like the one below: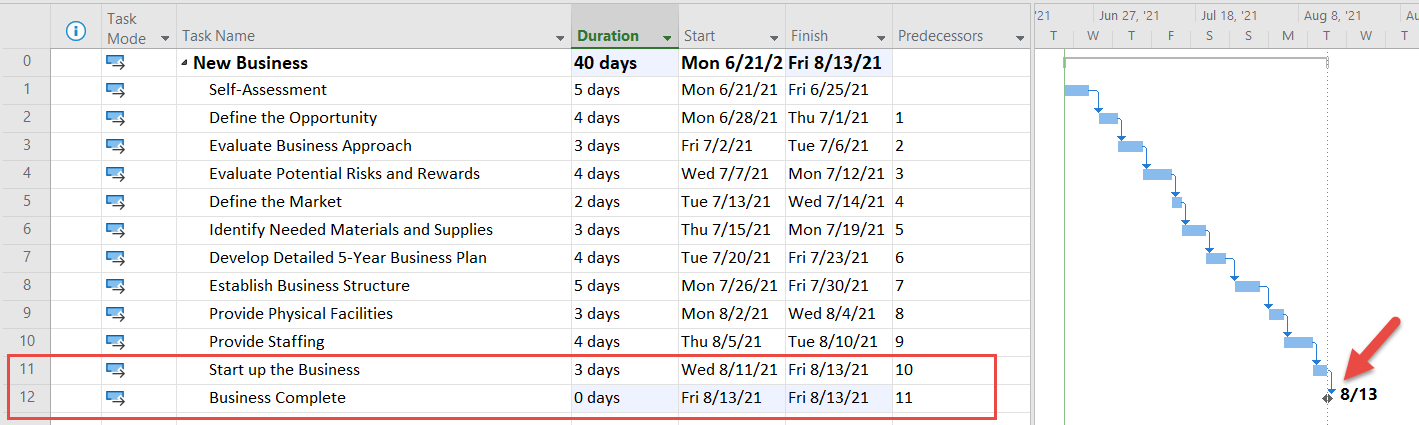
And there you have it. Your first, simple project created in Microsoft Project!
Related
Want your team to actually get this right? We train and advise teams on Microsoft Project — scheduling, calendars, resourcing — so your plans hold up in the real world, not just on paper.
Talk to our team