Table of contents
Introduction
Microsoft Project is without a doubt one of the most popular project management tools ever developed. This project management software by Microsoft is designed to provide project managers the ability to do project planning, build schedules, assign various types of resources to tasks (assignments) track progress, and much more.
We are going to dig into some items that are important in project management, followed by a quick start for creating a plan.

The Critical Path
In project management, there is something called the critical. Defined, the critical path is the longest sequence of tasks that must be completed to successfully conclude a project, from beginning to end. The tasks on the critical path are known as critical activities.
This is because if any one of them is delayed, the whole project will be delayed. Microsoft Project identifies critical path, which helps project managers determine the total duration of a project, and have a clearer picture of the project’s actual schedule. The Critical Path will be visible in the Gantt Chart via red bars upon selecting the appropriate view.
Resource Allocation
Are resources overallocated? If so, MS Project provides the ability to level your resources. This is a process by which the Office 365 software looks at all assigned resources work for situations of overallocation, and attempts to resolve it by moving work to other period of time on the project timeline view. Although this powerful feature is very helpful proper Microsoft Project Training is necessary in order to achieve desired results.
Project Resources, (people, equipment and materials) are listed on a resource sheet and assigned to project tasks, creating assignments. The process of doing this achieves a resources workload view or resource forecast view of effort required over time. This takes into consideration a resource's calendar, which specifies the hours-per-day, days-per-week they may work. The calendar ultimately determines a resources capacity for project work.
Using a custom field such as role will even help demonstrate resource load by role, which is often a very powerful data point for many organizations.

The resources on the resource sheet could conversely added to a separate mpp file as a resource pool. This way the resources may be shared across projects and resource requirements (capacity vs. demand) across projects may be determined. Resource rates may also be used to calculate resource costs. These costs are ultimately aggregated to summary tasks and project-level.
The Project Budget
Microsoft Project also helps project managers determine project costs. The Project files create budgets based on assigned resources and resource rates, as well as other resource types such as Material and Budget.
MS Project Versions
Remember, whatever the version of MS Project, whether MS Project 2010, MS Project 2013, MS Project 2016 or Microsoft Project 2019, these features described work across many versions and are critical to proper project schedule and project portfolio management.
Creating a Schedule in Microsoft Project
Once you have access to Microsoft Project and launched the product you can specify some initial options.
After navigating to the Options for MS Project it is recommended to set the following items:
Task Mode: This should be set to Auto Scheduled mode, which will ensure your tasks are able to dynamically move based on Work, Duration, and any task relationships. It's the Auto-Scheduled mode that allows MS Project's powerful scheduling engine to shine.
Task type: There are three task types. Fixed Units, Fixed Duration, Fixed Work. Setting the default task type will help make the way your tasks react to changes in the project schedule more predictable.
Fixed Duration is very common to use for newer project managers as it is more predictable. Fixed Duration is based on time. Fixed Work is based on effort, and requires the entry of the expects number of hours to complete a task.

Project Properties
Two important items should be set in your Project's properties. This is the Start Date and Calendar.
Start Date: This is exactly how it sounds. You will need to specify a Start Date for your project. If you don't know it, just enter something as close as you think to an actual start date.
Calendar: The project calendar specifies the default hours-per-day and days-per-week project work may be performed. The calendar also includes the organizations holidays. This calendar may be overridden by a Task Calendar of Resource Calendar via layering calendars.
Enter Tasks
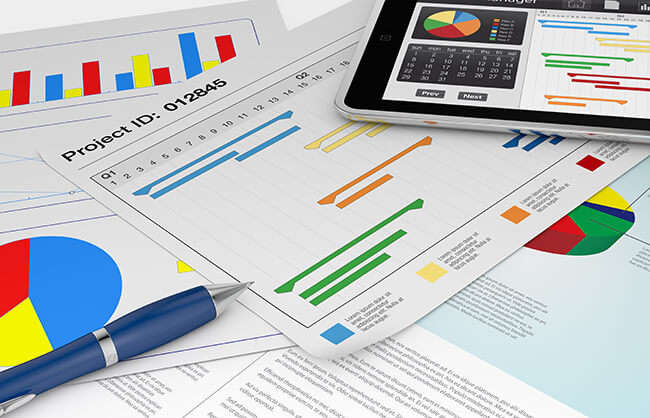
Ok, let's enter the task list! Using a Gantt Chart view, you can begin entering tasks in the spreadsheet on the left. As you do Gantt Bars will be generated which graphically represent the Start, End, and Duration of your tasks. This is a great visual representation of your project schedule once complete.
Keep the following in mind when creating your project schedule:
- Deliverables should be Summary Tasks
- Detail tasks should be the activities required to complete the deliverable
- Milestones should be used to mark the end of each deliverable
The benefits of using this approach include:
- Easier, simpler reporting
- The ability to focus on an display deliverables you specify
- Total Work, Cost and Duration for each deliverable
Once all your tasks have been entered into the spreadsheet and viewed in the Gantt chart, remember to save the project.
Entering Estimates
once your tasks are entered you may enter estimates. Enter either Work or Duration:

Note: ensure your Task Type is set to the type of estimate being provided.
Dependencies
Linking tasks to one-another is what creates our project timeline and critical path. It is now time to link tasks. Use the Predecessor column, or select tasks and use the Link Tasks button to create dependencies between every task in your project (do not link Summary Tasks).

Deadlines and Constraints
Regarding constraints, do not user inflexible constraints. What this means is do not directly enter a Start Date or Finish Date for any tasks. The estimates entered (Duration or Work) as well as the dependencies to other tasks will automatically calculate the appropriate dates.
Directly specifying a date will make your schedule inflexible. Meaning, tasks will not be able to automatically move based on the actual progress information for your project.
Instead, use deadlines if you want to specify a date. A deadline places a green arrow in the Gantt Chart to note the date selected, yet your tasks may still move based on tracking information.
Define and Assign Resources
Ok, we noted entering in all resources on the Resource Sheet earlier. Now you can go ahead and assign resources to the various tasks.
before doing so, ensure all resource vacation time has been entered on the resource's calendar!
use the Assign Resources dialog box or some other method to assign resources to tasks. Ultimately every detail task should have an assignment.
Remember not to assign resources to Summary Tasks.
Analyze the Critical Path
Remember our discussion about the critical path from earlier. Now with your work breakdown structure (WBS) complete you may review the calculated critical path. Select the appropriate view in order to see the red bars in the Gantt Chart.
Enter Progress Information

This is it. Your project is ready for execution. Before doing so, however, save a Baseline!
The baseline will give you data points from which to track success. Without it we will now know if we are coming in on time or on budget.
When progressing your schedule, you will enter the Actual for the estimate. Meaning, if you estimated Duration you enter Actual Duration, if you estimated Work you enter Actual Work. If someone finishes something early, zero out the Remaining Duration or Remaining Work.
Also, be sure to set the Status Date in the Project Information dialog box. This step will place a vertical line in the Gantt Chart displaying where progress should be at the point of the Date specified.
Reschedule incomplete work
That's correct, work that should have been complete by the Status Date will need to be rescheduled as appropriate. This is a process of adjusting Remaining values and other items.
Enterprise Capabilities
Microsoft Project may also be used in conjunction with Microsoft Project Online and Microsoft Project Server. Using this entire suite together provides and Enterprise ready Project and Portfolio Management solution with immense collaboration capabilities. This provides resource managers, team members, project management office members, and other stakeholders work together on projects getting the information necessary to perform the tasks of their role. The Microsoft Office 365 desktop application together with the features of Project Web App are a great PPM solution.
Conclusion
Well there you have it. Hope this helps with your understanding of MS Project Schedule Management!


