Call Us Today! 1-800-895-3254
[email protected]
Microsoft Training
Integent offers a comprehensive portfolio of training services, with an ideal fit for every organization. Ranging from general courses to custom solutions, we have you covered.
Learn About TrainingSee Full list of Courses
Microsoft Consulting
Integent provides consulting services for a variety of Microsoft applications including Microsoft Project, Project Online, Project for the Web, Dynamics 365, and Microsoft SharePoint.
Learn About Consulting
Microsoft Support
Microsoft technologies set the standard for project portfolio management, business applications, collaboration, and more. Integent has flexible solutions to support every customer.
Learn About Support
Microsoft Project
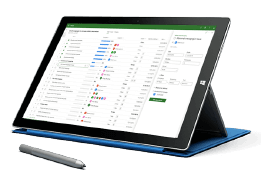
Integent has the knowledge and experience to help design and deploy a solution to help your organization manage projects and resources more effectively
Learn More About Microsoft Project
Microsoft Dynamics 365
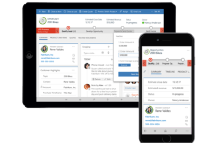
Integent can help you nsure business continuity with a custom cloud solution that connects sales, service, finance, and operations teams to deliver results.
Learn More About Dynamics 365
Microsoft SharePoint
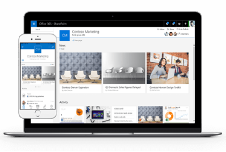
SharePoint is Microsoft’s collaboration platform that is a place where team members can communicate, exchange data, share files and much more.
Learn More About Microsoft SharePoint
Microsoft Power Platform
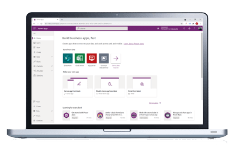
Consisting of Power BI, Power Apps, Power Automate and Power Virtual Agents, the Microsoft Power Platform helps streamline and improve business functions.
Learn More About The Power Platform
About Integent
Integent was founded in 2009 on the principles of building long-lasting relationships with customers, exceeding expectations, and providing outstanding customer service. 

We’re dedicated to providing a customized solution backed by our knowledgeable team of Microsoft experts.
Discover What Makes Us Different
GSA Schedule
Integent is GSA Schedule Contract holder. A GSA schedule helps simplify selling our services to government customers.
Read More Here
News
Stay informed on Integent’s latest company updates and other important industry information. Our passion is customer success.
Read The Latest News
Videos
Learning new software doesn’t have to be difficult with our library of dozens of free training videos. Our video training always has something new.
Browse Our Training Video Library
Blog
Our industry experts share best practices and common pitfalls to avoid, in order to get the most out of your technology solutions.
Discover More

August 24, 2022

How to add users to Microsoft Project Online

Adding Resources and Users to MS Project Online: Microsoft Project Online Training

ok, so you need to add users to the Enterprise Resource Pool in Microsoft Project Online? The process is actually quite simple once you understand how to do it. The process starts by adding users in the Microsoft 365 Admin center via logging into the Office 365 portal. Be sure to assign the appropriate MS Project Online license when doing this part. Once added to the portal, now your user may be added to Microsoft Project Online. The process is different depending on whether you are in SharePoint Permission mode or Project Permission mode. We cover both in this video.

Project Permission Mode

In Project Permission Mode there is a Security group of command in Project Web App (PWA) Settings. This particular permission mode allows for very granular permissions for your users. Think visibility based on reporting structure using a Resource Breakdown Structure (RBS). This is my preferred mode simply because it's very powerful, and, why not? To add a user in this mode select PWA Settings. Then in the Security grouping of commands click Manage Users. Next you will want to click the New User button. The first item you want to focus on in the New User screen is the User logon account (User account). In here you simply begin to type the user name in the text box (this is most often the users email address). What should happen is users who's name match what you are typing will show up. Select the correct user from the list of users. The next section that is important is the Security Groups section. By default the system will have just the Team Members added to this user in the Groups that contain this user text box. If this person is to be a Team Member you would leave as-is. However, if the user is to be a Project Manager, simply select the Project Manager group from the Available Groups dialog box, then click the greater than sign button. This will add the group to the Groups that contain this user section. You may want to remove the Team Members group while you are here. In the identification section note the checkbox for User can be assigned as a resource. This is specifying whether the user can be added to a project team in MS Project using the Build Team from Enterprise functionality as well as assigned to tasks in project. With the checkbox unchecked, the user will be able to login to the system, however, the user will not be able to be assigned to project tasks. Make the appropriate selection based on the requirements for the user. All other settings on the New User screen are dependent on your organizations user and configuration of the system. If there are Resource Fields or Custom Fields to be assigned, you may do that here. Otherwise, click the Save button to save all the specified settings for the user.

Alternative method

In Project Permission Mode you may also use the Resource Center to add users. From the Resource Center click on the New button in the Resources section of the ribbon. Other than not having the ability to select what security group the user belongs to you now have a very similar screen to what you had in Manage Users. Use the same procedure outlined above and Save when finished. Since you are unable to select a security group the user will be added to the Team Members group by default. Use the Manage Users or Manager Groups links in the Security grouping to manipulate the resource security level.

SharePoint Permission Mode

In SharePoint Permission Mode select the gear in the top-right of the screen, then click the Site Settings link. In the Users and Permissions section, select the Site permissions link. From the ribbon select the Grant Permissions button. In the Share SPM dialog box, begin typing the name of the users in the top text box. As you type the user name those matching will show up in a list. Select resource from the list. Click on the Show Options link. Consider the Send an email invitation checkbox. Next, select the appropriate permission from the Select a permission level drop down list box. typically Team Members, Project Manager or Administrator will be used most often. Click the Share button when completed.

Microsoft Project Professional

the Microsoft Project client may be used to bulk edit resources using the Resource Sheet (all sheet, no Gantt Chart) instead of Project Web App. You merely select all the resources you want to edit from the Resource Center, then click the Open in MS Project Professional button. You can now insert columns as necessary in the view and assign any necessary field values in the project management software. If you like, you can also add generic resources in the sheet. Select File > Close when finished. Consider now that Microsoft Project is for more than just project plans and complex projects! Hope you learned a bit more about Microsoft's Project and Portfolio management solution. Microsoft Teams. Consider watching one of our Power BI training videos!
© Copyright 2023 | Integent.com | All Rights Reserved
linkedin facebook pinterest youtube rss twitter instagram facebook-blank rss-blank linkedin-blank pinterest youtube twitter instagram